Wednesday, December 14, 2011

Simple Fried Rice


My mom made this fried rice and it was really good. It was also homemade which sometimes makes it better than take-out. I always love making fried rice. Our family bought a wok recently. Fried Rice can be made with any vegetables, meats, and whatever you think of putting in it.


Simple Fried Rice
1 medium onion, halved from pole to pole; each half cut into 6 wedges
4 to 6 ounces meat of choice, cooked or raw, cut into bite-size pieces
4 to 6 ounces vegetable of choice, cooked or raw, cut into bite-size pieces
1 large garlic clove, minced
2 large eggs, beaten
4 tablespoons soy sauce
4 tablespoons vegetable oil
4 cups cooked rice
4 scallions, white and green parts, minced

1. Set a heavy-bottomed 12-inch nonstick or cast iron skillet over low heat while preparing meat, vegetable, garlic, and eggs. Marinate the meat in 1 tablespoon of soy sauce. Three to four minutes from making the fried rice, increase the heat to high and turn on the exhaust fan.

2. Put 1 tablespoon of oil and the onion in the skillet; stir-fry until the onion is still crisp but starts to turn brown, about 1 minute. Add the raw meat or vegetable; stir-fry until crisp-tender for vegetables or lightly browned for meat, about 1 minute. Add the cooked meat or vegetable; stir-fry until lightly browned, about 1 minute longer. (If both meat and vegetables are raw or cooked, stir-fry the meat first, giving it a little head start.) Stir in the garlic, then transfer the mixture to a plate; set aside.

3. Put the remaining 3 tablespoons oil in the skillet; heat until shimmering. Add the rice; stir-fry, breaking up clumps, until heated through, about 2 minutes. Add the egg; stir until scrambled, about 1 minute. Return the meat/vegetable mixture, along with the remaining 3 tablespoons of soy sauce and the scallions, to the pan and stir to combine. Serve immediately.

Sunday, November 27, 2011

Thanksgiving Meal 2011

This year my mom's family was in town from New Jersey to enjoy Thanksgiving with us. They arrived on Tuesday and left on Saturday. The turkey, which my dad made, was amazing. A lot of people were involved in making the Thanksgiving meal. My dad made the turkey, my mom made the corn pudding, my aunt made the roasted vegetables and salad, my brother and I made the stuffing, My cousin Nell chopped and pealed much of the produce that went into the meal, my uncle made the mashed potatoes, and my uncle made the pies with my mom. The house was full of flavors from the cooking of every dish. The turkey was so juicy. Having one bite of everything, made me feel like I was in heaven of food. The turkey was stuffed with handfuls of herbs. My dad didn't put any stuffing in the bird which made the bird incredibly good with just the herbs. In other blog posts I will post about all of the wonderful sides we had with the turkey. Everybody did something in the kitchen to make the Thanksgiving meal a great one.

Saturday, November 5, 2011

The Best donuts Ever!

This donut shop in Grand Marais, Minnesota is the best. They have at least 15 kinds of donuts made at once. It is located right by the water of Lake Superior. This is a small shop but it is worth stopping by there if you are traveling the North Shore in Minnesota. The donut shop is called "The Worlds Best Donuts". They have glazed donuts, dipped donuts, and along with a few more varieties. I have been there twice and I have almost fainted each time when I had my first bite of my donut. The donut shop is right by the Angry Trout Cafe in Grand Marais MN, which I mentioned in one of my other posts. The link below will get you right to the website of the Worlds Best Donut Shop.

Thursday, November 3, 2011

The Angry Trout Cafe

This cafe is one of the best fish restaurants in Minnesota. The fish is caught right in Lake Superior which is about 25 feet away from the restaurant. There are about 4 docks that you can walk out on and see the boats that they use to catch your meal. This restaurant is in Grand Marais, Minnesota. It is about 110 miles away from Downtown Duluth. The restaurant also gets some of the fish they use to prepare the meals from The Dockside Fish Market next door. The Dockside smokes their own fish and has a little dinning area inside. We happened to try their Whitefish spread that was outstanding on a fresh baguette. The fish market gives some of the fish it catches to the Angry Trout next door. I will post both links one to the Angry Trout and one to The Dockside fish market next door.


Wednesday, November 2, 2011

The Scenic Cafe

One of the best cafe's I have been to is the New Scenic Cafe. This Cafe is very kid friendly. It is on Lake Superior which is always a great thing. Most of the ingredients are local or organic which makes a healthy living. The Scenic Cafe has outdoor seating when it is nice enough outside with a beautiful flower garden in the outdoor seating. If you are driving up north this is a wonderful place to stop and have a bite to eat. The Scenic Cafe is 15.4 miles out of the city of Duluth, MN. The restaurant has many windows on the inside which makes a lot of natural able to luminate the restaurant on any kind of day. The walls are made out of wood, which makes you nice and relaxed inside the restaurant with a lot of artwork hanging on the walls. The link below will take you to the site of the New Scenic Cafe.

Best Italian Restaurant

Do you wonder where the best Italian restaurant is? Well the answer to that question is Bellisio's Italian Restaurant in Duluth, Minnesota. This restaurant is right on the water of the Duluth Harbor. The good thing about this restaurant is it is kid friendly. I have been to this restaurant 2 times and the food was great there. If you live in the Minneapolis area it's about a 2 and 1/2 hours away. All of the pasta there is homemade. The sauces are homemade and many other items are as well. When you are done with your meal you might like to take a walk out on the pier and look out on the lake and see what you can find or you can go to one of the thousands of gift shops in downtown Duluth. The site below is the link right to the website of Bellsios's restaurant. People think that Bellisio's is the best italian restaurant in Minnesota. It may seem like an Olive Garden from the outside but once you walk in "Welcome To The Land of Italian Food".

Saturday, October 8, 2011

A great way to recycle

A great way to compost would be a worm composter. These tools will decrease the amount of trash you throw away each week. I even have a worm composter and it is a great thing to have in the house. The things you can get in reward from a worm composter is well fertilized soil and worm tea (worm urine). Worm composters come in many different shapes and sizes. The composter I have is nice because I can keep it in the house without worrying about worms crawling out of the bin or having an awful smell. The one bad thing about a worm composter is that you cannot put meat in it but you can put a lot of other things in the bin. This link below gives you a nice site to look at that has different bins and appliances. After a little while you will notice that their will be tons of little baby worms in your bin. You might gag a little but it is worth seeing the babies because then you know that they will be helping the army of other worms. If you do use the soil produced by the worms it will give your plants nice healthy and moist soil. With the worm tea you just pour it on the plant or soil and just wait and see what comes. The bin I have has a little spout that you push down and the worm tea comes out of. One thing with the worm tea is that you need to make sure that the little canvas sheet is in the right place on the bottom. I had that problem with mine where the canvas sheet was not covering the whole thing so the tea would just leek through. I also kept a little bucket under the tea spout so when I was ready to pour some tea on my plants it would drip into this small bucket.
Happy composting!!!

http://www.composters.com/vermiculture-worms.php

Sunday, August 14, 2011

Last day at the farm

Day 5 was my last day at the farm. Even though we left around 8:30 a.m I still got to do a couple of last minute activities. Even though this was my last day I still had such a fun time at the farm.
___________________________________________________________________
Day 5


  • The Interns picked the biggest bunches of Basil.
  • I got to participate in putting the Basil and ice packs in the boxes and load them into the van.
  • Dropped off the boxes and myself at home
-------------------------------------------------------------------------------------------------------------------

When I got back home life was so different from the farm because there were not as many cars out at the farm. There was a dirt road but the traffic was not like the city. The nice thing about the farm is that there is always a small breeze in the air. The landscape was amazing. I got pretty lucky that there was only one day when it was raining outside. Even though the days went by really fast I still had a really fun time.

Thursday, August 11, 2011

Next couple of days on the farm

I've already posted about the first couple of days. This post will be about the next couple days on the farm. Days 3 and 4.
---------------------------------------------------------------------------------------------------------------------------------


Day 3


  • I had the chance to help harvest the Red Potatoes, Cabbage, and Onions.
  • Norm let me drive the tractor which he uses the most. It is an Orange, Kubato Tractor and I got to drive the John Deere as well.
  • I got to help the Farmers daughter groom one of the horses named Leo.
  • We did the Chores which included feeding the horses and the chickens.
  • The farmers daughter and I folded the produce boxes in the garage.
  • I got to help the interns plant seeds for Red Romain, Onion, and Pac Choi.
  • Helped Norm check out the Bee's.
------------------------------------------------------------------------------------------------------------------
Wednesday which was my last full day was very successful. We completed the same tasks as we did every other day.
------------------------------------------------------------------------------------------------------------------
Day 4

  • I got to help the farmer drag the horse arena with the tractor.
  • The farmers daughter and I groomed Owden then we brought him up to the arena that was dragged earlier in the day.
  • Chores which included feeding the horses and taking care of the chickens.
  • I got to participate in harvesting the Parsley.
  • I Cooked Dinner for everyone (I will include the recipe in this post)
  • At the end of the day we played some Badmitten on the front lawn.
  • I got to help with filling the produce boxes.
------------------------------------------------------------------------------------------------------------------
Stuffed Green Peppers


2 Cups Cooked White Rice
10 Green Peppers(Stem cut off and cleaned out with spoon)
2 Chopped Onions
1 Big Bunch Parsley Chopped
2 Cups of Shredded Cheese for melting
10 Slices of Bacon
-----------------------------------------------------------------------------------------------------------------
Set your oven to 350 degrees.

  1. Wash off peppers with warm water then cut the steam off the pepper and clean the seeds out with a spoon.
  2. Chop up the onions very fine with the parsley and put the onions and parsley in a mixing bowl.
  3. Once rice is cooked mix the onions and parsley in with it.
  4. Cook 1 strip of bacon for each pepper. Cook bacon until it just starts to brown. Chop bacon.
  5. Once bacon is done mix the bacon into the rice, onion, and parsley.
  6. Fill the pepper with filling(The peppers will get full after one scoop of filling so just push the filling down the pepper with a spoon.)
  7. Sprinkle cheese on the top of the peppers.
  8. Line the peppers up on a baking pan and bake until peppers are a little soft and just getting brown (about 15 - 20 minutes).

Sunday, August 7, 2011

First couple of days at the farm

The first day that I was on the Farm, the interns were not with us. It was just Norm and me. Most of the stuff we did on my first day were maintenance tasks and chores.
_______________________________________________________________________________

Day 1

  • We fixed the mower tractor attachment which was tangled with irrigation tube.
  • Norm let me drive the John Deer tractor/lawn mower down to the barn from the apple orchard.
  • I got to participate in cleaning one of the horse stall. Then we brought the bedding to the compost pile.
  • Norm and I walked the fields to see what might be in the next box for the CSA members.
  • Chores, which included feeding the chickens and checking for eggs and feeding the horses once we rounded them up.
  • I got to participate in bringing the house compost up to the compost pile.
------------------------------------------------------------------------------------------------------------------
On Day 2 the interns arrived and Norm, the interns, and myself started doing more serious work on the farm.
__________________________________________________________________
Day 2

  • I had the chance to meet the interns and have a little Monday Morning Meeting where we talked about what we would be doing this coming week.
  • I had the chance to harvest the cucumbers, summer squash, pan pan squash, zucchini, and raspberries.
  • Transplanted Romaine Lettuce.
  • Planted seeds for beets and carrots.
  • Norm let me drive the John Deer again.
  • The interns and I weeded the 300 foot Serrano Pepper bed.
  • I got to help with the chores which includeds the chickens and horses.

Saturday, August 6, 2011

Trip To The Farm

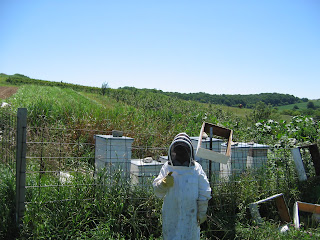
Me in a bee suit for the first time

Another shot of me in the bee suit

A shot of a part of the lower area based crops

Tons of onions drying out

The tractor waiting in the field
when not being used

A close up shot of the tractor in the field


A larger view of the onions drying out and some other plants
towards the back of the trailer

Another shot of the trailer

Some plants that are growing in cells towards the
back of the trailer


Recently I went down to our CSA farm for a week to do some farming. My family dropped me off on Saturday then the farmer drove me back on Thursday. Each day I woke up at 6:30 toke an hour brake for lunch and dinner and then went bake to work for a couple hour in the evening. Every day in my journal I tracked each thing I did in the day. While I was there I worked with 4 interns the farmer and myself. I was the only kid there. Most of the time meals were eaten pretty quick because we had a lot of work to do. Most of the vegetables we ate where from the farm. The farmer was helpful and taught me so much. The farm was really beautiful. There was always a little breeze which was really nice. In my next few posts I will blog about what I did each day on the farm.

Sunday, July 17, 2011

First trip to the garden


A few of the broccoli plants

Some of Summer Squash plants

Some of the explosive growing herbs


Yesterday I paid my first visit to my friends garden/urban farm. We planted some Summer Squash and it is exploding! I planted some corn and some popping corn.The corn we planted will come up in September or October. My friend planted a variety of herbs that are also growing really well. One thing that I did not know, is that we ordered and planted pickling cucumbers. Our first cucumber is almost ready to be picked. The gardening season has been a little slow with all the rain and bad weather. This year we did not plant the watermelon like we did last year. This year we expanded the garden by tilling another little strip of land right next to the patch where we planted last year. I will be visiting the garden a little more than I have been. So far I have been able to water and do some weeding. I will be going up to the CSA farm around July 29. I will certainly add posts from my time on the farm at the end of the month.

Saturday, June 11, 2011

Gardening 2011

Some Chives growing in a rectangular pot

A variety of herbs

Mint growing in the ground.

Some of the Chives growing in the ground

Some Basil growing in the ground

Another shot of the the Basil


Hi folks, After a long break with my blog I 
am planning on doing more posting now that school is over and it is summer. I will be posting more about family grill recipes now that I can grill outside. At home we have started growing some Oregano, Chives,Basil,Cat Grass,and some over yummy herbs. This summer I will also be doing some more farming at Patrick's and I will always post about each harvest. At Patrick's we are growing most of the same stuff that we did last year.

With 2011 starting I plan to do more gardening. This summer we have joined the CSA farm again and we are looking forward to a great summer. This summer I will be spending 6 to 7 days at Earth Dance Farms, helping out with the farming. While I am at the farm I will try to take some cool pictures and then when I get back I will post them.

If you do have a garden, or some pots with flowers or herbs I would water them every other day. If they are outside check them every day to see if you need to water them. Check to see if the soil is dry. If it is darker then it does not need to get watered or if it is lighter then the normal color then it should get watered.


Tuesday, March 1, 2011

Cocoa Brownies with Browned Butter and Walnuts

On February 27, 2011 we made these Cocoa Brownies for our friends Patrick and Jessica when they came over to enjoy dinner with us. We had fun making these brownies for dessert. We topped the brownies with some homemade Banana ice cream with a homemade chocolate sauce. The brownies where one of the best kinds I have ever had. It did not take a lot of time to make this yummy brownies.


Cocoa Brownies with Browned Butter and Walnuts

Nonstick vegetable oil spray
10 tablespoons (1 1/4 sticks) unsalted butter, cut into 1-inch pieces
1 1/4 cups sugar
3/4 cup natural unsweetened cocoa powder (spooned into cup to measure, then leveled)
1 teaspoon vanilla extract
2 large eggs, chilled
1/3 cup plus 1 tablespoon unbleached all purpose flour
1 cup walnut pieces

Position rack in bottom third of oven; preheat to 325°F. Line 8 x 8 x 2-inch metal baking pan with foil, pressing foil firmly against pan sides and leaving 2-inch overhang. Coat foil with nonstick spray. Melt butter in medium saucepan over medium heat. Continue cooking until butter stops foaming and browned bits form at bottom of pan, stirring often, about 5 minutes. Remove from heat; immediately add sugar, cocoa, 2 teaspoons water, vanilla, and 1⁄4 teaspoon (generous) salt. Stir to blend. Let cool 5 minutes (mixture will still be hot). Add eggs to hot mixture 1 at a time, beating vigorously to blend after each addition. When mixture looks thick and shiny, add flour and stir until blended. Beat vigorously 60 strokes. Stir in nuts. Transfer batter to prepared pan.

Bake brownies until toothpick inserted into center comes out almost clean (with a few moist crumbs attached), about 25 minutes. Cool in pan on rack. Using foil overhang, lift brownies from pan. Cut into 4 strips. Cut each strip crosswise into 4 brownies. DO AHEAD: Can be made 2 days ahead. Store airtight at room temperature.

Banana-Fudge Sundaes

On February 27, 2011 we had our friends, Patrick and Jessica over for dinner. With this Banana Ice Cream recipe we also made some brownies. We served the Banana Ice Cream over the Brownies with a homemade chocolate sauce (that is included in the sundae recipe) over that. My dad and Jessica said they could really taste the banana in the ice cream. I will also post the brownie recipe on my blog.

Banana-Fudge Sundaes

3 very ripe bananas, peeled, each cut crosswise into 4 pieces
1 14-ounce can sweetened condensed milk, divided
1 cup half and half
2 tablespoons light corn syrup
1 tablespoon fresh lemon juice
1/2 cup bittersweet chocolate chips
1 ripe banana, peeled, diced (for garnish)

Puree 3 bananas, 3/4 cup condensed milk, half and half, corn syrup, and lemon juice in processor until smooth. Transfer to ice cream maker; process according to manufacturer’s instructions. Transfer to container. Freeze until firm, about 4 hours.

Heat 1/2 cup sweetened condensed milk and 1 tablespoon water in small saucepan over medium heat; add chocolate. Stir until melted and smooth, adding more water by teaspoonfuls if sauce is very thick.

Divide ice cream among bowls. Drizzle sauce over; top with diced banana

Thursday, February 24, 2011

Lasagna with Turkey Sausage Bolognese

For Presidents Day my family went up to Big Birch Lake in Minnesota. We were invited by some really good friends of ours. On the last night my mom made this really yummy Lasagna with a Turkey Sausage Bolognese for the 4 adults and 4 children. Buy the next lunchtime there were no leftovers.


Lasagna with Turkey Sausage Bolognese

2 tablespoons olive oil
2 cups chopped onions
1/2 cup diced carrot
1 tablespoon fennel seeds, crushed in spice mill or in mortar with pestle
1 pound spicy Italian turkey sausages, casings removed
3 large garlic cloves, pressed
1/2 cup dry white wine
5 cups crushed tomatoes with added puree (from two 28-ounce cans)
1 cup chopped fresh basil, divided
2 tablespoons chopped fresh oregano
1 15-ounce container whole-milk ricotta cheese
3 cups (packed) coarsely grated whole- milk mozzarella cheese (12 ounces)
1 1/4 cups freshly grated Parmesan cheese, divided
16 6 1/2 x 3 1/4-inch no-boil lasagna noodles

Heat oil in large nonstick skillet over medium-high heat. Add onions, carrot, and fennel seeds; sauté 5 minutes. Add sausage and garlic; sauté until sausage is cooked through, breaking into pieces, 8 to 10 minutes. Add wine; boil 1 minute. Add tomatoes, 1/2 cup basil, and oregano. Bring to boil. Reduce heat; simmer until sauce thickens, about 10 minutes. Season with salt and pepper.

Combine ricotta, mozzarella, 1 cup Parmesan, and 1/2 cup basil in medium bowl; stir to blend. Season with pepper. DO AHEAD: Sauce and cheese mixture can be made 1 day ahead. Cover separately; chill.

Place noodles in large bowl; cover with hot water. Soak until pliable, separating occasionally, about 30 minutes. Drain well.

Preheat oven to 375°F. Spread 1 cup sauce over bottom of 13 x 9 x 2-inch glass baking dish. Cover with 4 noodles, arranging crosswise. Drop 1/4 of cheese mixture over by tablespoonfuls; spread out. Top with 1 cup sauce, then 4 noodles and 1/3 of remaining cheese mixture. Repeat 2 more times with 1 cup sauce, 4 noodles, and 1/2 of cheese mixture. Spread any remaining sauce over. Sprinkle with 1/4 cup Parmesan.

Bake lasagna uncovered until heated through and puffed, about 50 minutes. Let stand 10 to 15 minutes and serve.Lasagna with Turkey Sausage Bolognese
2 tablespoons olive oil
2 cups chopped onions
1/2 cup diced carrot
1 tablespoon fennel seeds, crushed in spice mill or in mortar with pestle
1 pound spicy Italian turkey sausages, casings removed
3 large garlic cloves, pressed
1/2 cup dry white wine
5 cups crushed tomatoes with added puree (from two 28-ounce cans)
1 cup chopped fresh basil, divided
2 tablespoons chopped fresh oregano
1 15-ounce container whole-milk ricotta cheese
3 cups (packed) coarsely grated whole- milk mozzarella cheese (12 ounces)
1 1/4 cups freshly grated Parmesan cheese, divided
16 6 1/2 x 3 1/4-inch no-boil lasagna noodles

Heat oil in large nonstick skillet over medium-high heat. Add onions, carrot, and fennel seeds; sauté 5 minutes. Add sausage and garlic; sauté until sausage is cooked through, breaking into pieces, 8 to 10 minutes. Add wine; boil 1 minute. Add tomatoes, 1/2 cup basil, and oregano. Bring to boil. Reduce heat; simmer until sauce thickens, about 10 minutes. Season with salt and pepper.

Combine ricotta, mozzarella, 1 cup Parmesan, and 1/2 cup basil in medium bowl; stir to blend. Season with pepper. DO AHEAD: Sauce and cheese mixture can be made 1 day ahead. Cover separately; chill.

Place noodles in large bowl; cover with hot water. Soak until pliable, separating occasionally, about 30 minutes. Drain well.

Preheat oven to 375°F. Spread 1 cup sauce over bottom of 13 x 9 x 2-inch glass baking dish. Cover with 4 noodles, arranging crosswise. Drop 1/4 of cheese mixture over by tablespoonfuls; spread out. Top with 1 cup sauce, then 4 noodles and 1/3 of remaining cheese mixture. Repeat 2 more times with 1 cup sauce, 4 noodles, and 1/2 of cheese mixture. Spread any remaining sauce over. Sprinkle with 1/4 cup Parmesan.

Bake lasagna uncovered until heated through and puffed, about 50 minutes. Let stand 10 to 15 minutes and serve.
Crispy Noodle Cakes with Hoisin Chicken

On February 23, 2011 my mom made this really yummy family dinner. It was hard making the noodle cakes because my mom needed a plate to help her flip them in the pan. She was patient when she was cooking the noodles so that they would get crispy.


1/4 lb. dried rice sticks (vermicelli)

1 Tbs. plus 1 tsp. Asian sesame oil
2 small boneless, skinless chicken breast halves (about 3/4 lb.), cut into 1/2-inch dice
1 tsp. dry sherry
Kosher salt
2 Tbs. hoisin sauce
1 Tbs. soy sauce
2 tsp. rice vinegar
3 Tbs. canola oil
3-1/2 oz. shiitake mushrooms, stemmed and thinly sliced (1-1/2 cups)
4 oz. baby spinach (4 lightly packed cups)
Asian chile sauce, like Sriracha (optional)

Bring a medium pot of water to a boil. Remove the pot from the heat, add the noodles, and soak them until tender, about 5 minutes. Drain, transfer to a baking sheet lined with paper towels, and pat dry. Toss the noodles with 1 Tbs. of the sesame oil.

Toss the chicken with the remaining 1 tsp. sesame oil, the sherry, and 1/4 tsp. salt.

In a small bowl, mix the hoisin sauce, soy sauce, and vinegar.

Heat 1-1/2 Tbs. of the canola oil in a 12-inch nonstick skillet over medium-high heat until shimmering hot. Add the mushrooms and cook, stirring, until softened and lightly browned, about 2 minutes. Add the chicken and cook, stirring, until it just loses its raw color, about 2 minutes. Add the spinach and cook, stirring, until it wilts, about 1 minute. Add the hoisin mixture and cook, stirring, until the chicken is cooked through, about 1 minute. Transfer to a bowl.

Wipe out the skillet with a paper towel. Heat the remaining 1-1/2 Tbs. oil over medium heat. Divide the noodles in half and spread them in the pan, forming two oblong cakes (if they become entangled, just cut them apart with scissors). Sprinkle lightly with salt and cook until the bottoms are lightly browned and crisp, 4 to 5 minutes. Flip, sprinkle lightly with salt, and cook until the second sides are browned and crisp, about 4 minutes more. Transfer to serving plates, top with the chicken, and serve with chile sauce, if using.

1/4 lb. dried rice sticks (vermicelli)
1 Tbs. plus 1 tsp. Asian sesame oil
2 small boneless, skinless chicken breast halves (about 3/4 lb.), cut into 1/2-inch dice
1 tsp. dry sherry
Kosher salt
2 Tbs. hoisin sauce
1 Tbs. soy sauce
2 tsp. rice vinegar
3 Tbs. canola oil
3-1/2 oz. shiitake mushrooms, stemmed and thinly sliced (1-1/2 cups)
4 oz. baby spinach (4 lightly packed cups)
Asian chile sauce, like Sriracha (optional)

Bring a medium pot of water to a boil. Remove the pot from the heat, add the noodles, and soak them until tender, about 5 minutes. Drain, transfer to a baking sheet lined with paper towels, and pat dry. Toss the noodles with 1 Tbs. of the sesame oil.

Toss the chicken with the remaining 1 tsp. sesame oil, the sherry, and 1/4 tsp. salt.

In a small bowl, mix the hoisin sauce, soy sauce, and vinegar.

Heat 1-1/2 Tbs. of the canola oil in a 12-inch nonstick skillet over medium-high heat until shimmering hot. Add the mushrooms and cook, stirring, until softened and lightly browned, about 2 minutes. Add the chicken and cook, stirring, until it just loses its raw color, about 2 minutes. Add the spinach and cook, stirring, until it wilts, about 1 minute. Add the hoisin mixture and cook, stirring, until the chicken is cooked through, about 1 minute. Transfer to a bowl.

Wipe out the skillet with a paper towel. Heat the remaining 1-1/2 Tbs. oil over medium heat. Divide the noodles in half and spread them in the pan, forming two oblong cakes (if they become entangled, just cut them apart with scissors). Sprinkle lightly with salt and cook until the bottoms are lightly browned and crisp, 4 to 5 minutes. Flip, sprinkle lightly with salt, and cook until the second sides are browned and crisp, about 4 minutes more. Transfer to serving plates, top with the chicken, and serve with chile sauce, if using.

Monday, February 14, 2011

Dark Chocolate Truffles

The Brownies on the tray ready to get baked


 Yesterday, February 13, 2011, my mom and me made some dark chocolate truffles. My brother and I gave our teachers these tasty delights for Valentine's Day. It was our first time making truffles together. The truffles turned out like truffles from the local candy shop. We surprised our dad with a box of 9 truffles. "He said, they were amazing truffles".

1 cup heavy cream
2 tbsp light corn syrup
1 tbsp butter,unsalted,soft
2 1/3 Dark chocolate,pistoles or chopped 1/2-inch pieces
2 cups Dark chocolate or dark compound coating,chopped in 1/2-inch pieces for dipping
--------------------------------------------------------------------------------------------------
1. Line a 9x13-inch baking pan with parchment paper.
2. Combine the cream and corn syrup in a 2-quart saucepan and bring to a boil.
3. Remove from the heat. Add the butter and chopped chocolate or pistoles to the cream and stir until smooth and homogeneous.
4. Pour the finished ganache into the baking pan to make a thin layer and cover with plastic wrap. Refrigerate for 1 hour or more until the ganache is firm.
5. Put the ganache in a mixer bowl and mix on medium speed using a paddle attachment for 30 seconds. Or stir vigorously in a mixing bowl by hand,using a spatula.
6. Allow the ganache to rest at room temperature for 5 minutes. Line a sheet pan with parchment paper.
7. Using a #100 scoop or teaspoon ,scoop out balls of ganche and place on the sheet pan at room temperature.
8. When all of the ganache has been scooped,roll each portion by hand into a round ball.
9. Melt and temper the chocolate for dipping. If using compound coating,follow the heating instructions on the package.
10. Dip the ganache centers in the tempered chocolate or compound coating using on of the dipping techniques.

Makes 60 pieces


Wednesday, February 9, 2011

Portuguese Chicken

A couple weeks ago my friends came over and my mom made this really amazing Portuguese Chicken dish which she served with a potato dish. My mom and her sister decided to make that same dish that weekend. When I was eating the chicken it fell off the bone because it was so tender.

Portuguese Chicken

1 cup all purpose flour
1 tablespoon plus 1/4 teaspoon Hungarian sweet paprika
1 3- to 3 1/4-pound chicken, cut into 8 pieces
2 tablespoons extra-virgin olive oil
1 14.5-ounce can diced tomatoes in juice
4 ounces thinly sliced prosciutto, chopped
12 cipolline onions or 1-inch-diameter pearl onions, blanched 1 minute, peeled
2 large roasted red peppers from jar, halved, cut into 3/4-inch-wide strips
6 large garlic cloves, pressed
4 large fresh Italian parsley sprigs
4 large fresh bay leaves, bruised
1/2 cup dry white wine
1/2 cup tawny Port
1 tablespoon Dijon mustard
1 tablespoon tomato paste
1 tablespoon butter, room temperature (optional)

Preheat oven to 350°F. Whisk 1 cup flour, 1 tablespoon paprika, 1 1/2 teaspoons salt, and 1/2 teaspoon freshly ground black pepper in large bowl. Add chicken pieces to seasoned flour, 1 at a time, and turn to coat. Heat oil in heavy large skillet over medium-high heat. Add chicken, skin side down, and sauté until brown, 3 to 5 minutes per side. Transfer chicken to plate; reserve skillet.

Arrange chicken in single layer in large ovenproof pot. Top with tomatoes and juice, prosciutto, onions, peppers, garlic, parsley, and bay leaves; sprinkle with 1/4 teaspoon paprika. Add wine and Port to reserved skillet. Bring to boil, scraping up browned bits. Remove from heat. Whisk in mustard and tomato paste; pour mixture over chicken and bring to boil. Cover; transfer to oven.

Braise chicken until very tender, about 1 1/2 hours. Discard bay leaves and parsley. Using tongs, transfer chicken and toppings to platter. Return sauce in pot to simmer. If thicker sauce is desired, stir 1 tablespoon flour and butter in small bowl until smooth paste forms. Add flour paste to sauce and whisk to blend. Simmer until sauce thickens to desired consistency, whisking often. Season sauce to taste with salt and pepper. Spoon over chicken and serve

Monday, February 7, 2011

Homemade Pasta

Over the last 2 weeks my class at school has been participating in a program named Midwest Food Connection supported by the school PTA and the Wedge Co-Op. This week we made homemade pasta dough. Then we made it into noodles, boiled them in a pan and enjoyed them. The noodles where so good that we were given the recipe to take home.

1 & 1/2 cups all-purpose or semolina flour
1 egg
1 tbsp. olive oil
1/4 cup water(or more as needed)
1 tbsp. salt (for cooking water)

1. Place flour in bowl. Make a small well in the mound.
2. Break in egg, mix briefly.
3. Mix in oil and water (exact amounts not necessary)
4. Mix first with fork, then knead dough with hands for about 2 minutes.
5. Add small amounts of flour if dough is too sticky or water if too dry.
6. When ready, dough should not stick to clean hands. Can rest for a while.
7. Form into shapes, using about a nickel size amount of dough and drop into boiling,salted water. Cook for about 4 minutes. Noodles are done when they float to the surface. Drain noodles.
8. Enjoy with your favorite topping.

Serves 2-4

Wednesday, January 5, 2011

Aunt Heidi's blog

My mom's sister Heidi has a blog of her own about cooking. I was really inspired when I read this blog. Heidi asked me if I would link to her blog and I said: "Sure thing Heidi."

www.lifefamilyfood.com